
Scope of this technical record
A field-to-bench workflow for ATV61 / ATV71 OSF and USF cases that keeps high DC-bus voltage, low DC-bus voltage, input measurement, braking evidence and precharge/DC-link repair boundaries separate.
The workflow crosses hazardous input and DC-link boundaries. Use qualified live measurement practices, isolate before internal inspection and verify discharge before any contact with the DC-link, brake or power-board area.
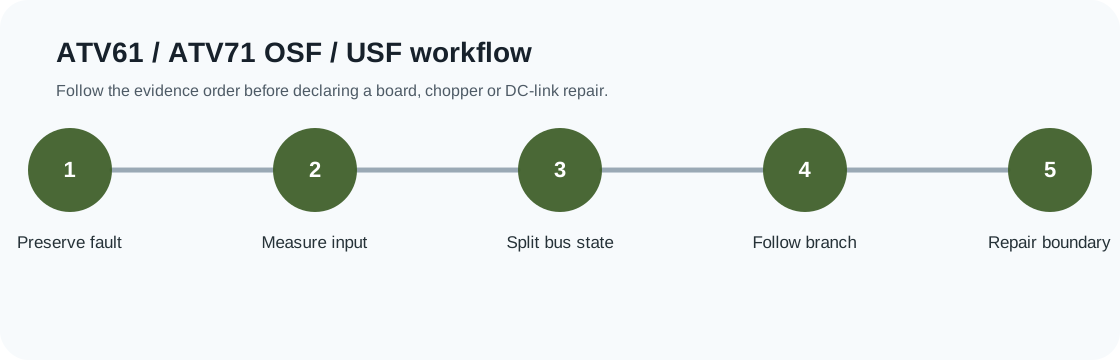
OSF / USF voltage workflow route
The workflow keeps high-bus and low-bus cases on separate service routes.
ATV61 / ATV71 OSF USF workflow image
Voltage workflow outcome matrix
The workflow must end with a field correction, braking/ramp action, precharge/DC-link repair case or replacement decision.
| Evidence outcome | Next action | Avoid |
|---|---|---|
| High line or charging OSF | Correct supply or voltage-class issue | Brake-chopper replacement |
| Regenerative OSF | Adjust ramp/brake route and verify duty | Control-board replacement |
| USF with stable input but abnormal bus | Prepare precharge/DC-link repair evidence | Repeated power cycling |
Step 1 — preserve the first event before reset
Record the first fault in the queue, the state of the machine and the exact timing. The same OSF code has different meaning at capacitor charging, idle, deceleration or after a power transfer. The same USF code has different meaning at power-up, after run command, during a line-contactor transition or during a facility voltage sag.
- Photograph the display or keypad record before reset
- Record power-up, enable, acceleration, steady load, deceleration or line transfer timing
- Record whether the motor was connected and whether the machine was returning energy
Step 2 — measure the input at the drive, not only upstream
Measure line-to-line voltage at L1/L2/L3 on the drive side of the disconnect and contactor under the relevant condition. A healthy upstream panel reading can still become a USF at the drive if a fuse, contactor pole, terminal or line reactor path is weak. A high or unstable line condition can also contribute to OSF at power-up or idle.
Step 3 — split OSF and USF into opposite routes
If the bus is high, follow the OSF route: line level, charging state, regenerated energy, deceleration ramp, brake resistor, chopper and bus feedback. If the bus is low, follow the USF route: line supply, fuses, contactor, precharge, rectifier, capacitor bank and bus measurement. Do not merge the two into one vague supply fault.
Workflow branch decision
| Branch | Continue with | Stop or escalate when |
|---|---|---|
| OSF | Line high, charging state, regeneration, brake path | Brake resistor overheats, load cannot be controlled, bus feedback is inconsistent |
| USF | Input phases, fuses, contactor, precharge, DC link | Input is stable but bus collapses or precharge evidence is abnormal |
| Intermittent | Plant voltage trend and event correlation | The fault follows load starts, generator transfer or contactor changes |
Step 4 — define the repair boundary
The repair boundary is reached when field evidence no longer explains the event. For OSF, that means line and braking evidence are known and the remaining suspicion is bus sensing, chopper command or internal DC-link hardware. For USF, that means line measurements are stable and the remaining suspicion is precharge, rectifier, capacitors or bus feedback.
Step 5 — prepare a voltage-fault evidence package
A good voltage-fault package prevents the case from being routed to the wrong board. It includes type code, voltage class, first event, line measurements at the drive, DC-bus evidence where safe, ramp/brake information for OSF, input/precharge information for USF and any previous repair history.
Field record checklist
- First event before reset
- Line voltage at the drive
- DC-bus evidence
- OSF brake/regeneration branch
- USF input/precharge branch
- Repair boundary evidence
Technical basis and reference documents
This is an independent editorial technical reference. Original manufacturer documentation remains controlling for installation, repair and commissioning decisions.
Used to anchor OSF around DC-bus over-supply detection during capacitor charging and PWM-deactivated states.
Used to anchor USF around low DC-bus voltage and field measurements on L1/L2/L3 and PA(+)/PC(-).
Used to anchor undervoltage thresholds, incoming line checks, monitoring menu comparison and undervoltage-management timing.
Used for family-level fault-management and drive-parameter context; public pages avoid reproducing proprietary tables.
Linked records
The drive has detected excessive DC-link voltage. The first split is high incoming line or charging state versus returned machine energy, braking resistor/chopper condition, DC-bus feedback and previous repair evidence.
The drive DC bus is below the undervoltage boundary. The route begins with measured L1/L2/L3 voltage at the drive terminals, then fuses, contactor, precharge, rectifier, DC-link storage and bus measurement evidence.
Routes OSF and USF evidence through the full energy path: L1/L2/L3 input, fuses, contactor, rectifier, precharge, DC-link capacitors, PA(+)/PC(-) bus measurement, brake chopper and braking resistor route.
Turn this record into a qualified service request
A repair decision is much more reliable when the request includes the exact identity of the drive, the first fault evidence and the machine condition when the symptom appeared.
- Complete drive type code / MLFB or nameplate model
- Fault code, fault value and first event before reset
- When the event appears: power-up, enable, ramp, run, decel or stop
- Motor/cable connected or isolated during the symptom
- Visible board, option-card, module and connector identifiers
- Previous repair history, replacement parts and repeat-failure pattern